Trans Am Livery Standards
Page 1 of 1

Trans Am Livery Standards
![]() by Sir John Raptor Sun Feb 24, 2019 4:37 pm
by Sir John Raptor Sun Feb 24, 2019 4:37 pm
Number Plate
(TL;DR instructions at end)
Finding number plate instruction:
1. Grab the Vehicle you wish to add the number plate to.
2. Go to "Paint and Customize" under Car Tab on main menu
3. Go to "Paint Car"
4. Go to "Apply Decals" (will load design editor)
5. Press "New Layer"
6. Press "Apply a Vinyl Shape" this will load the Primitive Shapes on your screen.
7. Press the Search Button (left select/start controller button with the double lapping boxes)
8. Go Down to the "Creator" Tab Press A on your controller. this will give you a manual keyword on your screen.
9. Type in " Baby Hueys59" (add space) and press "start button" (right start button with three stacked lines) go down and press "Search"
10. Select filename "DFWW Trans-Am #" press A button to obtain number plate.
The number plate will now be put on the side of you vehicle.
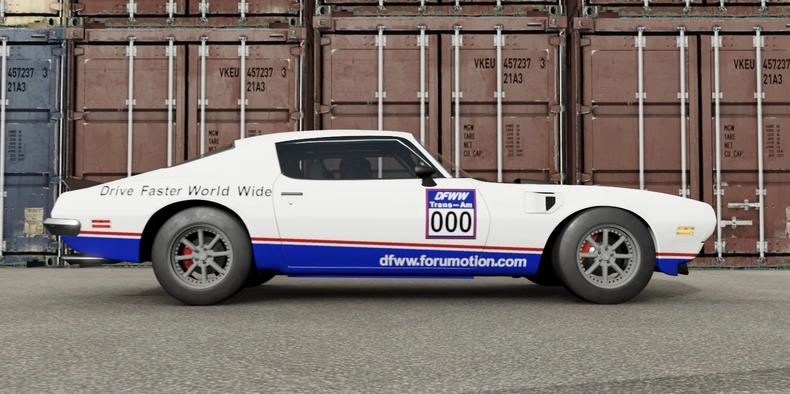
To move Number Plate use left joy stick to move number plate front door and behind front fender Size is 0.19. if the number plate is to large you may reduce the size.
(please see photos of where number plate should be)
Once in place Press A to set Number Plate and go back to design editor and layer groups.
Adding your Racing number. part 1
1. Press "New Layer"
2. Press "Apply a Vinyl Shape" this will load the Primitive Shapes on your screen.
3. Press "Square Shape" keep color white. press A button to select.
4. Hit "Right Button" (RB above Right Trigger) tab over once to "Size" tab.
5. Size X=0.48 , Y=0.29. you can use left thumb stick to adjust these numbers and D-Pad to adjust more precisely.
6. Hit "Left Button" (LB above Left Trigger) to the "Move" Tab.
7. use Left Joystick to Move Layer to cover up all three Zeros. (use D-Pad to line it up once close)
8. Press "A" to set in place.
Adding Racing Number Part 2
1. Press "New Layer"
2. Press "Apply a Vinyl Shape" this will load the Primitive Shapes on your screen.
3. Hit Right Button (RB above Right Trigger) to tab over to "Upper Letters 1"
4. Press "the number you need" change color Black. press A button to select.
5. Hit "Right Button" (RB above Right Trigger) tab over once to "Size" tab.
6. Size X=0.19 , Y=0.21. you can use left thumb stick to adjust these numbers and D-Pad to adjust more precisely.
7. Hit "Left Button" (LB above Left Trigger) to the "Move" Tab.
8. Use Left joystick to Move Layer to blank number plate (use D-Pad to line it up once close please center number as best as possible.)
8. Press "A" to set in place. and take you back to design editor
Repeat the above steps for each number you need.
Adding all required number plates
Copy Number plate grouped or individual layer.
1. Place on both sides of vehicle
2. Place on Hood of vehicle
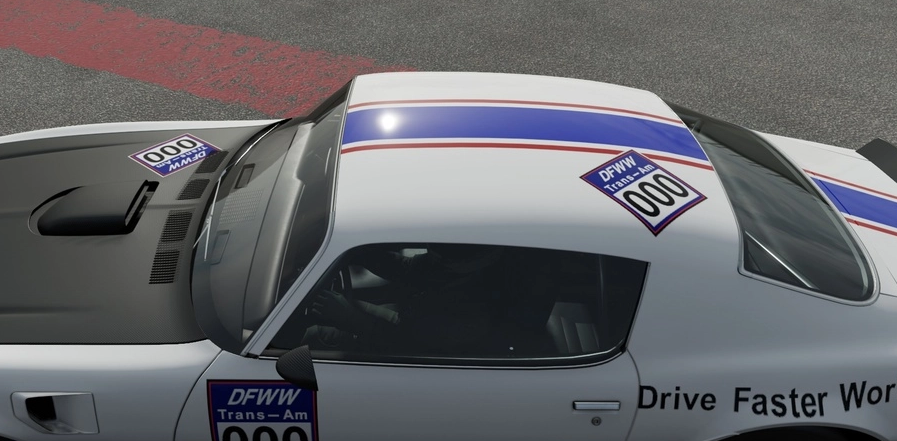
3. Place on Roof of Vehicle
TL;DR
search layer groups on FM7 for "DFWW" or Baby Hueys59"
Select it and add to car
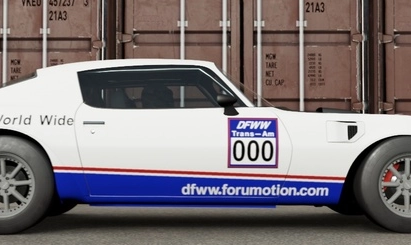
Place it on door panel behind front Pannel.
Cover up zeros with white box (X=0.48 , Y= 0.29)
Add Upper Letters 1 Numbers on number plate (X=0.19 , Y=0.21)
make sure number plate is on both sides of car, hood and roof.
Side of vehicle example
Top of vehicle example
Please let Baby Hueys59 or Sir John Raptor know if you need any help. Thank you.
(TL;DR instructions at end)
Finding number plate instruction:
1. Grab the Vehicle you wish to add the number plate to.
2. Go to "Paint and Customize" under Car Tab on main menu
3. Go to "Paint Car"
4. Go to "Apply Decals" (will load design editor)
5. Press "New Layer"
6. Press "Apply a Vinyl Shape" this will load the Primitive Shapes on your screen.
7. Press the Search Button (left select/start controller button with the double lapping boxes)
8. Go Down to the "Creator" Tab Press A on your controller. this will give you a manual keyword on your screen.
9. Type in " Baby Hueys59" (add space) and press "start button" (right start button with three stacked lines) go down and press "Search"
10. Select filename "DFWW Trans-Am #" press A button to obtain number plate.
The number plate will now be put on the side of you vehicle.
To move Number Plate use left joy stick to move number plate front door and behind front fender Size is 0.19. if the number plate is to large you may reduce the size.
(please see photos of where number plate should be)
Once in place Press A to set Number Plate and go back to design editor and layer groups.
Adding your Racing number. part 1
1. Press "New Layer"
2. Press "Apply a Vinyl Shape" this will load the Primitive Shapes on your screen.
3. Press "Square Shape" keep color white. press A button to select.
4. Hit "Right Button" (RB above Right Trigger) tab over once to "Size" tab.
5. Size X=0.48 , Y=0.29. you can use left thumb stick to adjust these numbers and D-Pad to adjust more precisely.
6. Hit "Left Button" (LB above Left Trigger) to the "Move" Tab.
7. use Left Joystick to Move Layer to cover up all three Zeros. (use D-Pad to line it up once close)
8. Press "A" to set in place.
Adding Racing Number Part 2
1. Press "New Layer"
2. Press "Apply a Vinyl Shape" this will load the Primitive Shapes on your screen.
3. Hit Right Button (RB above Right Trigger) to tab over to "Upper Letters 1"
4. Press "the number you need" change color Black. press A button to select.
5. Hit "Right Button" (RB above Right Trigger) tab over once to "Size" tab.
6. Size X=0.19 , Y=0.21. you can use left thumb stick to adjust these numbers and D-Pad to adjust more precisely.
7. Hit "Left Button" (LB above Left Trigger) to the "Move" Tab.
8. Use Left joystick to Move Layer to blank number plate (use D-Pad to line it up once close please center number as best as possible.)
8. Press "A" to set in place. and take you back to design editor
Repeat the above steps for each number you need.
Adding all required number plates
Copy Number plate grouped or individual layer.
1. Place on both sides of vehicle
2. Place on Hood of vehicle
3. Place on Roof of Vehicle
TL;DR
search layer groups on FM7 for "DFWW" or Baby Hueys59"
Select it and add to car
Place it on door panel behind front Pannel.
Cover up zeros with white box (X=0.48 , Y= 0.29)
Add Upper Letters 1 Numbers on number plate (X=0.19 , Y=0.21)
make sure number plate is on both sides of car, hood and roof.
Side of vehicle example

Top of vehicle example

Please let Baby Hueys59 or Sir John Raptor know if you need any help. Thank you.
Sir John Raptor- Posts : 9
Join date : 2019-01-26
Location : USA
Re: Trans Am Livery Standards
![]() by Sir John Raptor Sun Feb 24, 2019 11:10 pm
by Sir John Raptor Sun Feb 24, 2019 11:10 pm
Posting DFWW URL
1. Grab the Vehicle you wish to add the DFWW Website URL to.
2. Go to "Paint and Customize" under Car Tab on main menu
3. Go to "Paint Car"
4. Go to "Apply Decals" (will load design editor)
5. Press "New Layer"
6. Press "Apply a Vinyl Shape" this will load the Primitive Shapes on your screen.
7. Press the Search Button (left select/start controller button with the double lapping boxes)
8. Go Down to the "Creator" Tab Press A on your controller. this will give you a manual keyword on your screen.
9. Type in " Baby Hueys59" (add space) and press "start button" (right start button with three stacked lines) go down and press "Search"
10. Select filename "DFWW COM WHITE" or "DFWW COM WHITE" press A button to obtain URL.
DFWW URL will now be put on the side of you vehicle.
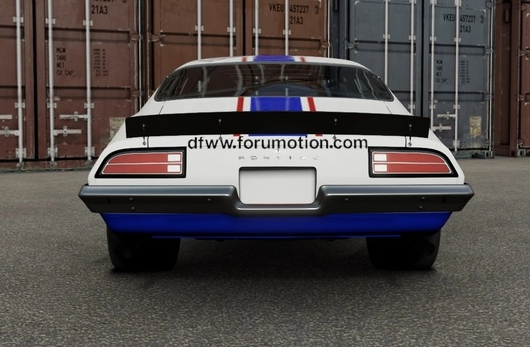
To move DFWW URL use left joy stick to place on the lower part of the car between the wheels. Size is around 0.15. Depending on your vehicle you may reduce the size, however the URL must be visible and readable.
(please see photos of where DFWW URL should be)
Once in place Press A to set DFWW website URL and go back to design editor and layer groups.
Copy Layer and paste on the other side as well as front and back of vehicle.
Example of URL on Side
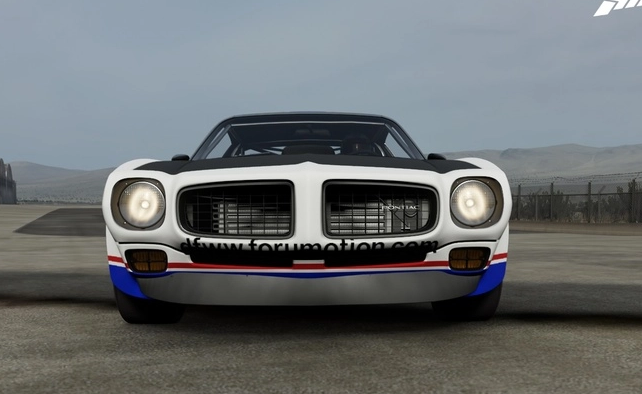
Example of URL on Front
Example of URL on Back
1. Grab the Vehicle you wish to add the DFWW Website URL to.
2. Go to "Paint and Customize" under Car Tab on main menu
3. Go to "Paint Car"
4. Go to "Apply Decals" (will load design editor)
5. Press "New Layer"
6. Press "Apply a Vinyl Shape" this will load the Primitive Shapes on your screen.
7. Press the Search Button (left select/start controller button with the double lapping boxes)
8. Go Down to the "Creator" Tab Press A on your controller. this will give you a manual keyword on your screen.
9. Type in " Baby Hueys59" (add space) and press "start button" (right start button with three stacked lines) go down and press "Search"
10. Select filename "DFWW COM WHITE" or "DFWW COM WHITE" press A button to obtain URL.
DFWW URL will now be put on the side of you vehicle.
To move DFWW URL use left joy stick to place on the lower part of the car between the wheels. Size is around 0.15. Depending on your vehicle you may reduce the size, however the URL must be visible and readable.
(please see photos of where DFWW URL should be)
Once in place Press A to set DFWW website URL and go back to design editor and layer groups.
Copy Layer and paste on the other side as well as front and back of vehicle.
Example of URL on Side

Example of URL on Front

Example of URL on Back

Sir John Raptor- Posts : 9
Join date : 2019-01-26
Location : USA
» Trans-Am car list
» DFWW Trans Am Rules
» Trans Am 2 Series Points
» DFWW Trans-Am series
» Season 4 IFCA Trans Am Relay Challenge
» DFWW Trans Am Rules
» Trans Am 2 Series Points
» DFWW Trans-Am series
» Season 4 IFCA Trans Am Relay Challenge
Page 1 of 1
Permissions in this forum:
You cannot reply to topics in this forum